The FER AI Toolkit can be accessed from various platforms, including smartphones and laptops. Patients or their caregivers are required to complete a user registration process through AIH, which grants them access to the FER AI-Toolkit using secure login credentials.
Introduction
The FER AI toolkit plays a crucial role in identifying potential symptoms of neurological disorders at an early stage. By analyzing facial expressions linked to particular conditions, it offers valuable insights into emotional states that could signal alterations in neurological health. Through this, it furnishes objective data that aids in recognizing shifts in neurological functioning.
This guide will walk you through the process of using the application to perform emotion recognition on facial images. Please follow these steps to utilize the system effectively.
Step 1: Login to the System
-
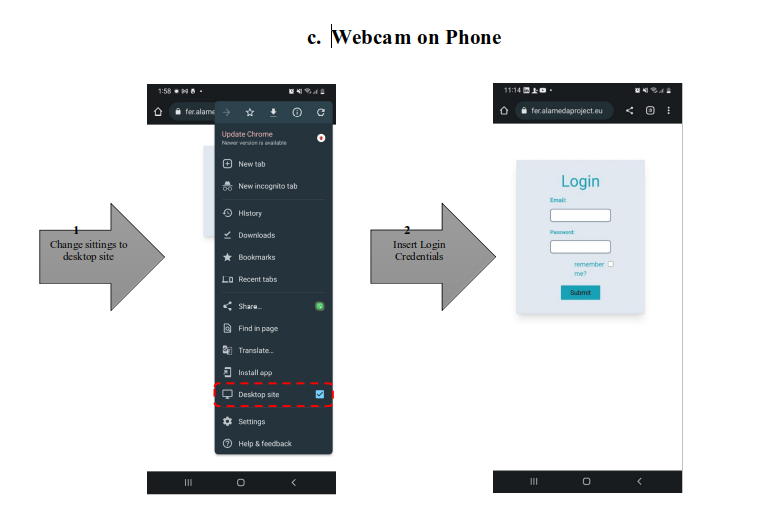
Open your web browser and navigate to the application's login page landed on this URL
-
If you do not have an existing account, contact your administrator to create a user account for you in the Identity and Access Management (IAM) system.
-
Enter your registered email address and password in the provided fields. Click the “Submit” button to access the system.
Step 2: Select Category and Upload Image/ Webcam
-
Upload image
-
Upon successful login, you will be directed to the main dashboard.
-
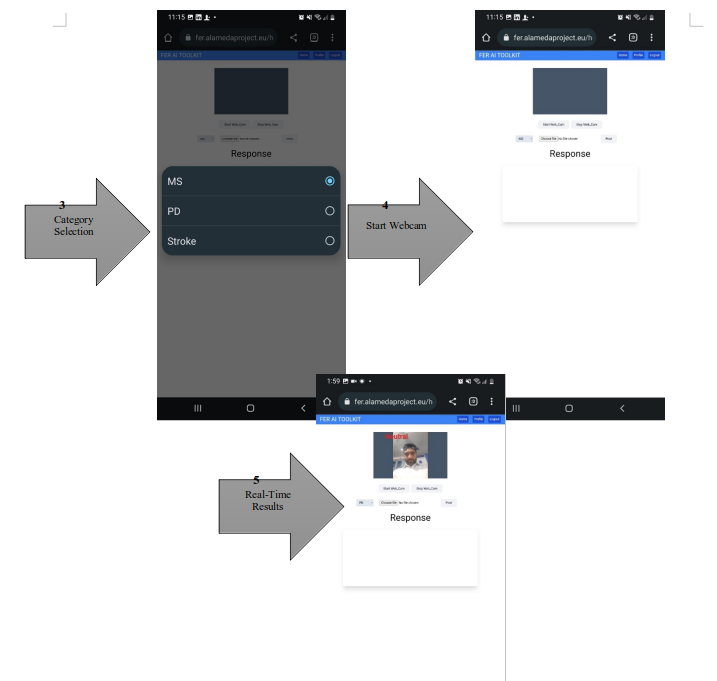
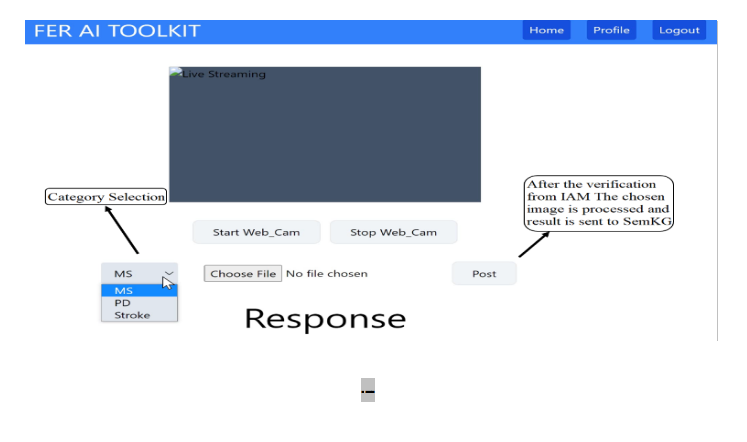
In the dashboard, locate the “Category” section and choose one of the available categories, such as “MS”, “PD” or “Stroke” .This selection helps customize the emotion recognition process based on the chosen category.
-
Once you've selected a category, proceed to the “Image Upload” section.
-
Click the “Upload Image” button to open your computer's file selection dialog.
-
Choose the facial image you wish to analyze for emotion recognition and click “Open”.
-
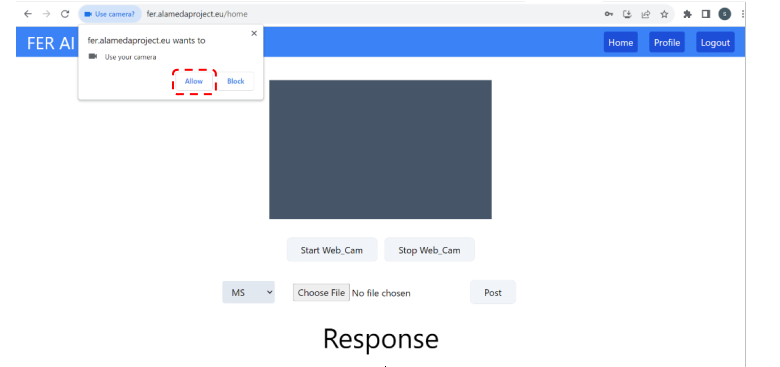
Webcam on PC
-
Upon successful login, you will be directed to the main dashboard.
-
In the dashboard, locate the “Category” section and choose one of the available categories, such as “MS”, “PD” or “Stroke”. This selection helps customize the emotion recognition process based on the chosen category.
-
Once you've selected a category, proceed to the “Start webcam” button.
-
Step 3: Perform Emotion Recognition
-
After selecting the image, it will be previewed on the screen.
-
Review the image to ensure it is the correct one for analysis.
-
If satisfied, click the “Post” button to initiate the emotion recognition process.
-
The system will process the image and perform emotion recognition based on the selected category.
-
The result of the analysis will be displayed in the “Response” section of the dashboard.
Additional Notes
-
If you encounter any issues during the login process or while using the application, please contact the system administrator or support team for assistance.
-
It's important to select the appropriate category for accurate emotion recognition results.
-
Ensure that the uploaded image is of sufficient quality and clearly shows the subject's facial expression.
-
The response section will provide details about the recognized emotions along with any relevant scores or data.
-
Remember to log out of the system when you have completed your session, especially if you are using a shared or public computer.
-
Thank you for using the FER AI-Toolkit. If you have any questions or require further assistance, please refer to the provided contact information or reach out to the support team.