This document contains material, which is copyright of certain ALAMEDA consortium parties and may not be reproduced or copied without permission. The information
contained in this document is the proprietary confidential information of certain ALAMEDA consortium parties and may not be disclosed except in accordance with
the consortium agreement.The commercial use of any information in this document may require a license from the proprietor of that information. Neither the ALAMEDA consortium as a whole, nor any certain party of the ALAMEDA consortium warrants that the information contained in this document is capable of use, or that use of the information is free from risk, and accepts no liability for loss or damage suffered by any person using the information. The contents of this document are the sole responsibility of the ALAMEDA consortium and can in no way be taken to reflect the views of the European Commission.
1.ALAMEDA Innovation Hub service registration
1.1Description of the process
One core functionality of the AIH is the registration of AI services by supply-side stakeholders and their invocation by demand-side stakeholders. The process is facilitated by an advanced API Gateway that adheres to the Open API specification in order to provide a single point of entry for the AI Toolkit services which should be provided in the form of self-standing microservices.
In a nutshell, the main role of the API Gateway module is to provide the single-entry point for all incoming HTTP requests from the demand-side stakeholders and to properly handle them by invoking the appropriate AI Toolkit services as defined in the parameters of the request. To this end, the API Gateway provides two major features: a) the automatic self-registration of the AI Toolkit services and b) the discovery and invocation of the registered AI Toolkit services through the sophisticated handling of the incoming requests by the demand-side stakeholders.
As explained, a prerequisite for the successful discovery and invocation of an AI Toolkit service is its proper self-registration in the Service Registry of the API Gateway. This particular process constitutes the main integration point of the candidate AI Toolkit services with the AIH. During the automatic service registration the Manager or Service Developer of the AI Toolkit service instructs the new service to self-register in the Service Registry, so that it can be directly accessible via the API Gateway. The API Gateway is being polled in small intervals by the AIH (in particular by the Services Integration Controller), in order for the latter to retrieve the list of newly created and/or updated services and consequently update the AIH Backend Services. Once the new service is successfully registered, the AIH Registered User can access the new service, provide feedback and subscribe to this service.

Figure 1: AIH API Gateway overview
2.Integration with the API Gateway of the AIH
2.1Integration prerequisites
This paragraph describes the actions that are required, in order for an AI Toolkit service developed within the context of T5.3, to be available under the API gateway. The conditions that should be met, are the following:
-
Each AI Toolkit service should be wrapped as a microservice using a corresponding framework (recommended: Spring Boot for Java, FastAPI for Python), and should expose the service’s functionalities (e.g. train, test, etc) as endpoints.
-
Each AI Toolkit service should be able to self register and deregister to the underlying Consul instance.
-
The name that each service should use to register to Consul should be unique, otherwise we may have problems where one microservice "overrides" the other, or being considered as an instance of the same service, which will inevitably lead to an unwanted load balancing.
-
(OPTIONAL) Each microservice should document their endpoints using OpenAPI specification (Spring Boot and FastAPI support this in an automated way almost out of the box).
-
(OPTIONAL) In case we want to allow to trigger a microservice's endpoint via Gateway's Swagger UI, the microservice should be configured properly, as if it was to be behind a reverse proxy, in order to handle X-Forwarded-For and X-Forwarded-Prefix headers.
-
During service registration to Consul, the following metadata needs to be provided:
-
authentication: Boolean, indicates if anyone accessing this service should be authenticated,
-
authorization: Boolean, indicates if the entity accessing the specific microservice should be authorized to do so
-
contextPath: String, the context path of the microservice. It can be an empty string "", or something like "/microservice1", "/linear-regression-model", etc
-
swaggerPath: String (OPTIONAL), the path holding the JSON representation of the OpenAPI documentation. For instance, when using Spring's springdoc library, this defaults to "/v3/api-docs", or if using FastAPI "/openapi.json". Of course those defaults can change, and that's why we need this info.
-
rateLimiterEnabled: Boolean (Optional), indicates if rate limiting should be applied. Default is true.
-
rateLimiterScope: String (OPTIONAL), accepted values are "global" or "user", default value is "global". Defines the rate limiting scope. Global means that rate limiting will be applied for all requests, while user means that rate limiting will be applied per user (requires an authentication/authorization mechanism to be in place).
-
rateLimiterReplenishRate: Integer (OPTIONAL), the number of requests that are being replenished every second. Default is 100.
-
rateLimiterBurstCapacity: Integer (OPTIONAL), the total number of requests that can be accepted per second. Default is 100.
-
rateLimiterRequestedTokens: Integer (OPTIONAL), the cost of each request. Default is 1.
-
retryAttempts: Integer (OPTIONAL), the number of times the request will be retried in case of failure. Default is 3.
-
retryFirstBackoff: String (OPTIONAL), The amount of time after which the first retry attempt will take place. Default is 10ms.
-
retryMaxBackoff: String (OPTIONAL), The maximum backoff to apply. Default is 50ms.
-
retryBackoffFactor: Integer (OPTIONAL), The backoff retry factor. Default is 2.
-
retryBackoffBasedOnPreviousValue: Boolean (OPTIONAL), If false, retries are performed after a backoff interval of max(retryFirstBackoff * (retryBackoffFactor ^ n), retryMaxBackoff), where n is the iteration. It true, the backoff is calculated by using max(prevBackoff * retryBackoffFactor, retryMaxBackoff). Default is false.
-
-
Once a service has been successfully registered to consul, an end user can access it on the following path: {GATEWAY_IP:GATEWAY_PORT | GATEWAY_DOMAIN}/{microservice-name-in-consul}/{endpoint}. ΝΟΤΕ: Including context-path is not required, as it is being added automatically by the Gateway.
2.2Self-registration by connecting to Consul
As it was depicted in the general integration prerequisites, the most important step to integrate with the API gateway is for a microservice to be able to self-register to Consul. In the following sections we provide some tutorials on how to do so when using Java with Spring Boot and Python, as well as how to start a Consul instance for experimentation purposes.
2.2.1Starting consul
In order quick start a Consul instance for experimentation purposes you should have Docker and docker-compose installed and updated to the latest version. Then, use the following docker-compose file:
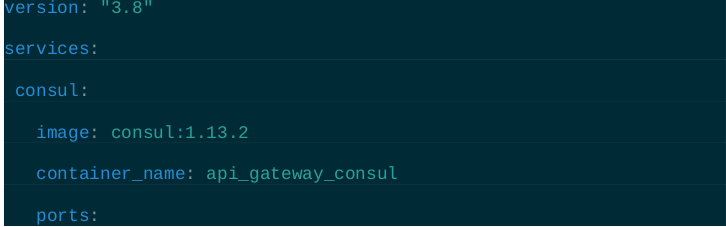

and just run the command:
|
docker-compose up -d |
Give it a few seconds, and then navigate to your browser at the address: http://localhost:8500 You should be able to see the Consul UI, as well as a pre-registered service, which is actually the Consul client. Now you are ready to register you service.
2.2.2Java – Spring Boot
-
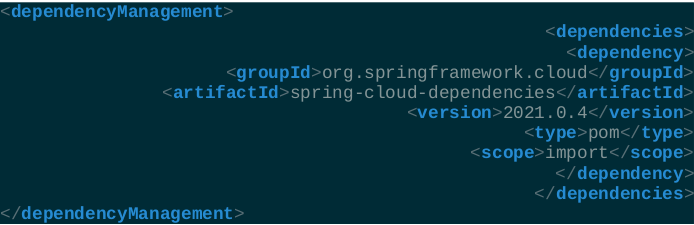
The recommended library to use is Spring Cloud Consul .
-
Include the dependency in you pom.xml

-
In your properties file, application.yml, the following info should be included

-
Create a RestController which exposes the endpoint /my-health-check-path which just returns a status 200 and will be used for health-checking.
2.2.3Python
-
The recommended library to use is python-consul2
-
The documentation page of the library contains very good guidelines on how to use this library. Additionally, the following tutorial could be also useful.